INTRODUCTION
The Leads Module in Investwell CRM helps you capture, track, and convert potential investors into clients. It centralizes all prospective opportunities — from imported contacts, marketing campaigns, or manual entries — for your sales team to act upon.
Path: CRM → Leads
TABLE OF CONTENTS
- INTRODUCTION
Purpose of the Leads Module
Manage potential investors before they become clients.
Track lead sources (Referral, Walk-in, Campaign, Website, etc.).
Assign leads to team members or sub-brokers for follow-up.
Add collaborators to leads for multiple organization users to work on it.
Convert qualified leads directly into clients.
Lead Stages
Each lead passes through standard lifecycle stages. You can configure these stages from the configuration button in the leads listing page. Eg:
New: Freshly created lead, yet to be contacted.
Contacted: Initial outreach completed.
Interested: Shown investment interest.
Qualified: Ready for onboarding.
Completed: Client record created.
Dump: Lead disqualified or no longer active.

Notes
Leads can be filtered or grouped by Stage, Source, Owner, or Status.
Automatic lead creation can also occur via API or Campaign Integrations.
Creating and Managing Leads
Leads can be created manually or automatically through integrated sources like campaigns, referral forms, or API uploads. The Leads module lets you edit, categorize, and track every prospect’s progress.
Path: CRM → Leads → Add New Lead
Creating a Lead Manually
Click Add Lead.
Fill in lead details — Name, Mobile, Email, and Other details
Assign an Owner (RM, Sub-Broker, or Self).
Click Save.
 Note: A Lead cannot be created with Duplicate mobile number.
Editing or Deleting a Lead
Click the pencil icon beside a lead in the listing row.
Choose Edit to update details.
Lead Assignment and Collaboration
Assigning leads ensures every prospect is owned and followed up by the right team member. You can also add collaborators to share access for coordination.
Path: CRM → Leads → Select Lead → Assign

Path: CRM → Leads → Open Lead → Add Collaborators

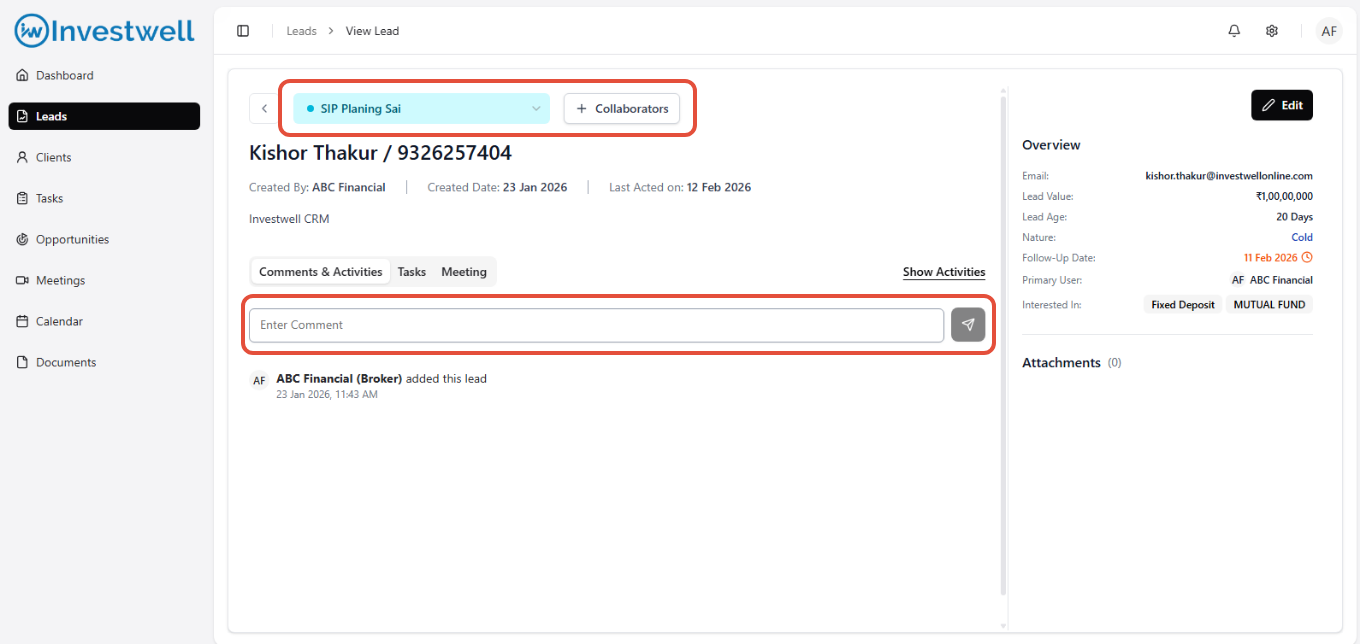
Assigning a Lead
Open the Lead record.
Click Edit
Choose the team member or sub-broker in the primary user field.
- Click Save.
- Alternatively, you can also assign lead by selecting a lead in the listing page and then changing assignee in the bulk actions provided above the leads listing table.

Adding Collaborators
Go to the Add Collaborators button within a lead.
Click Add Collaborator.
Select one or more users.
Save the changes.

All collaborators will have view and comment access. Edit access will be limited to the collaborators (Eg. A lead cannot be converted by a collaborator)
Notes
Each lead can have one Primary Owner.
Only Admins and Managers can reassign leads across teams.
Lead reassignments are logged with timestamps for audit tracking.
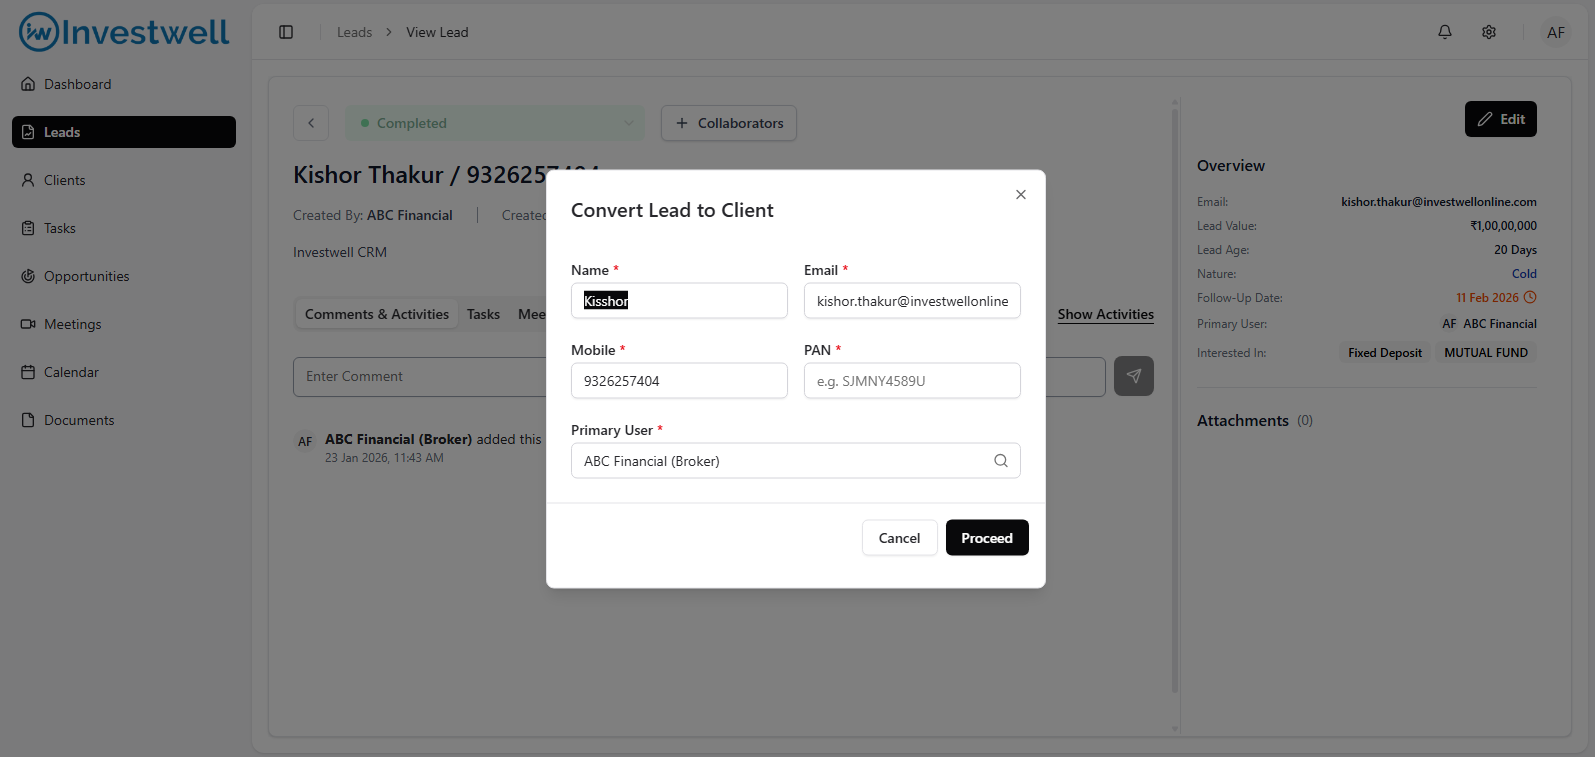
Converting a Lead to Client
Once a lead has been qualified and verified, it can be converted into a client record. During conversion, all associated tasks, comments, and logs move automatically to the client profile.
Path: CRM → Leads → Click on Lead → Change Status to Converted → Convert to Client pop up needs to be be filled with relevant data
Steps to Convert
Open the lead you wish to convert.
Click Convert to Client.
Confirm client details (Name, PAN, Email, etc.).
Assign to the appropriate RM or Sub-Broker.
Click Proceed.
What Happens During Conversion
A new Client Record is created in the Clients Module.
All linked tasks, comments, and meetings are transferred.
The Lead status changes to Converted.
Conversion logs are stored in the Activity Tab.
Notes
Name, PAN, Mobile and Email ID are mandatory fields for conversion.
Duplicate checks are run automatically on Name+PAN to prevent multiple client entries.
The new client will also sync to Mint within 1 hour.
Lead Filters, Sorting, and Quick Actions
The Leads List View provides multiple filters and actions to help you organize and act quickly on your lead pipeline.
Path: CRM → Leads
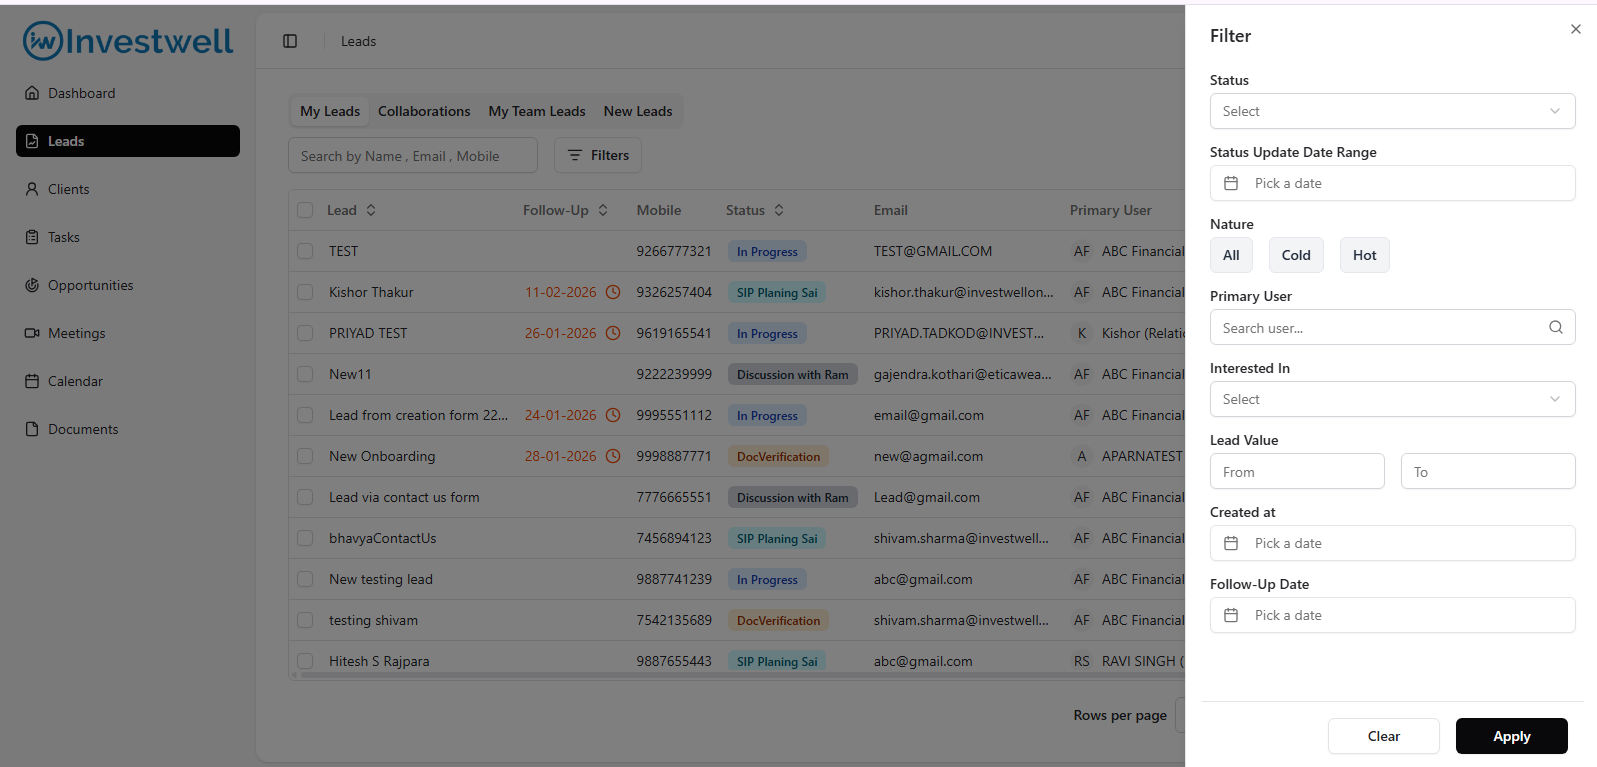
Available Filters
Status: New, Contacted, Interested, Qualified, Converted, Dropped
Primary user: Filter by RM/Sub-Broker name
- Created Date: Enter date range to find a lead created in that date range.
- Follow up Date: Enter date range to find a lead which has a follow up date in that date range.
- Interested In: A list of products that the lead is interested in. This list of products can be populated from the configuration master for products in the leads listing page by admin. Any newly created lead can choose one or more products from this master list.
- Nature: Hot lead or cold lead suggesting chances of conversion are high or low.
Quick Actions
From the Leads List view, you can:
Add Comment or Log directly
Mark Stage Change in-line
Add collaborators to lead
Was this article helpful?
That’s Great!
Thank you for your feedback
Sorry! We couldn't be helpful
Thank you for your feedback
Feedback sent
We appreciate your effort and will try to fix the article